As a website designer for coaches and offline experts of all kinds, I always ask for photography to begin a project. Yes, I need photos of YOU. And hey, big surprise, but a lot of people find that scary, or a big hurdle to jump over!
Truth is, there’s not too many of us who LOVE getting our photos taken (unless you’re a model, dahling, but then it’s unlikely you’re reading this…).
Studies show that people remember 80% of what they see, and only 20% of what they read. And there is also research that suggests that 65% of people are visual learners. When we pair that with the understanding that the human brain can process images in as little as 13 milliseconds, you can understand why the photography you use on your website is just as important (maybe even MORE important) than those words you are struggling over to describe your coaching program.

The mistakes most coaches and experts often make is they find a photographer they’re comfortable with (often a friend or relative), and get some pictures done, without realizing the specific shots needed for a website. Or they send me their “headshots” they got done for corporate….which really don’t work for a personal brand website.
Alllllrighty then – so getting amazing website photos can be tough. But don’t worry – I’m here to clear away the clutter and give you the exact steps and things you need to get amazing shots. Ones that will move your brand and your website from “hey, that’s nice” to “wowza – that’s amazing!”.
And you KNOW I’m all about the SOPs (standard operating procedures, guys!) and step-by-step’s so let’s gooooo…
Step 1 – Find Your Coaching Website Photographer
Seems simple, but consider that you will need to pay for great photography. Yes, I know your cousin is REALLY good, and your friend’s wedding photographer did an AMAZING job, but still – you need a PERSONAL BRAND PHOTOGRAPHER. Don’t settle for less, trust me.
What is a personal brand photographer?
It’s someone who specializes in photographing YOU, and creating a ‘look’ that will filter through to every place in your brand, and your website. It focuses on your personality, and brings your colours, your brand message and your mission all together to create images that you will use over and over, not only on your website, but in your social media, and everywhere you appear, online.
Why is it important to use a personal brand photographer for your website photos?
When it comes to building your coaching website, everything depends on the photography. After all, we are trying to make a connection between your ideal client and YOU.
People need to see you, and see you in different situations, to begin to understand who you are, what you can provide, and why they should buy from you. Static head shots just don’t cut it anymore.
Professional personal brand photography is essential to put your clients in that ‘buying’ mood – they love who you are and want to be a part of what you represent. Professional brand photography will pay for itself in the long run, without question.
How do you find a personal brand photographer for your website?
Try “personal brand photographer near me” in google. Look at your colleagues websites that you love and ask them who they used. Shop around. Make sure you feel comfortable and connect with the person you hire, so you can get the best shots.
There’s nothing worse than when I receive a bunch of photography where my client just looks ‘uncomfortable’ in every shot. Don’t be that person!
Step 2 – Think About Colour
Your photographer will be your trusted expert to help you get ready for your shoot (wardrobe, locations, etc) – but I want you to take that extra step and think about COLOUR. Your brand and your website will be defined by a colour palette that should be consistent throughout your marketing. When getting your photography done, consider the colour of the setting, what you are wearing, and the props you bring. And YES, you must bring props!!
Make sure elements of your colour scheme are present at your shoot and in what you are wearing, the more the better.
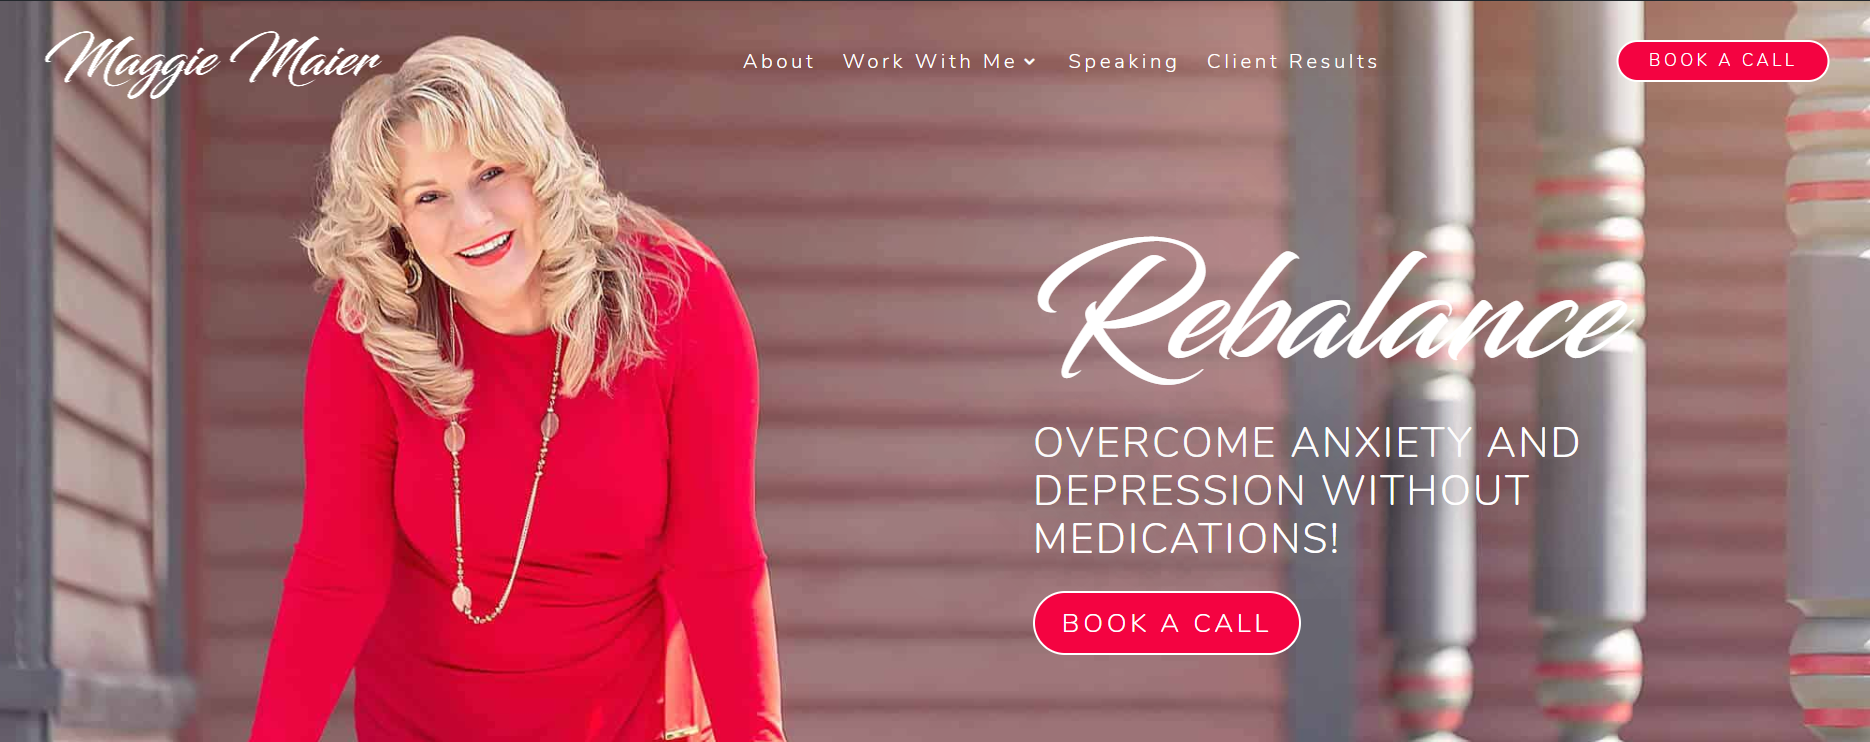
Photo Credit: Julie C Butler Photography
Step 3 – Instructions for Your Photographer
Just give this part to your photographer. Easy-peasy. Thank me later.
Hi there awesome personal brand photographer, I’m making a website for your client. Here’s what I need from you! (PS – can’t wait to see your shots!):
1. Header Image A
Horizontal image, where the client takes up ¼ of the image, and the background takes up ¾ of the image. Client is looking directly into the camera. (see below). Backgrounds for these header images should be: Mostly neutral, plain, or brand colour or out of focus (not too busy).
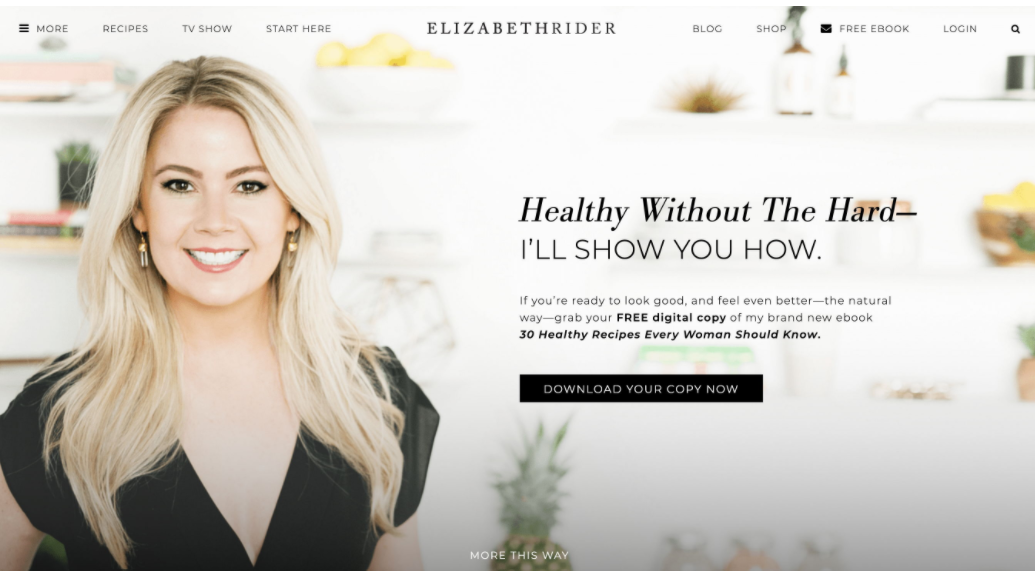

YES – I can crop the client out and put them on a different background (see below), and YES I can use a photo where the client is in the middle if I use an overlay (see below), but providing me with options is the key to success!
Here’s an image with the coach cut out and placed on another background:
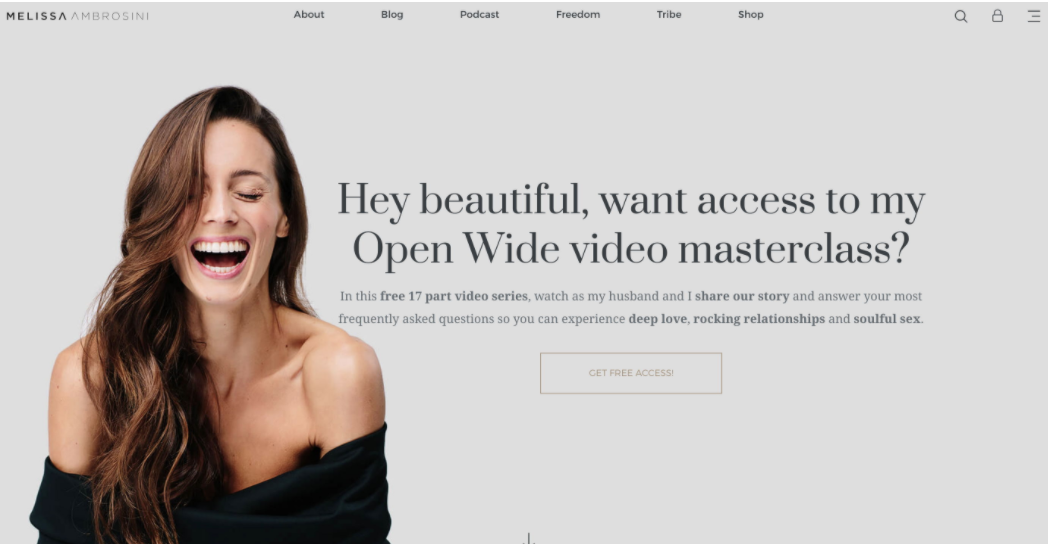
Here’s an image with the coach in the middle of the shot, using an overlay:

2. Header Image B
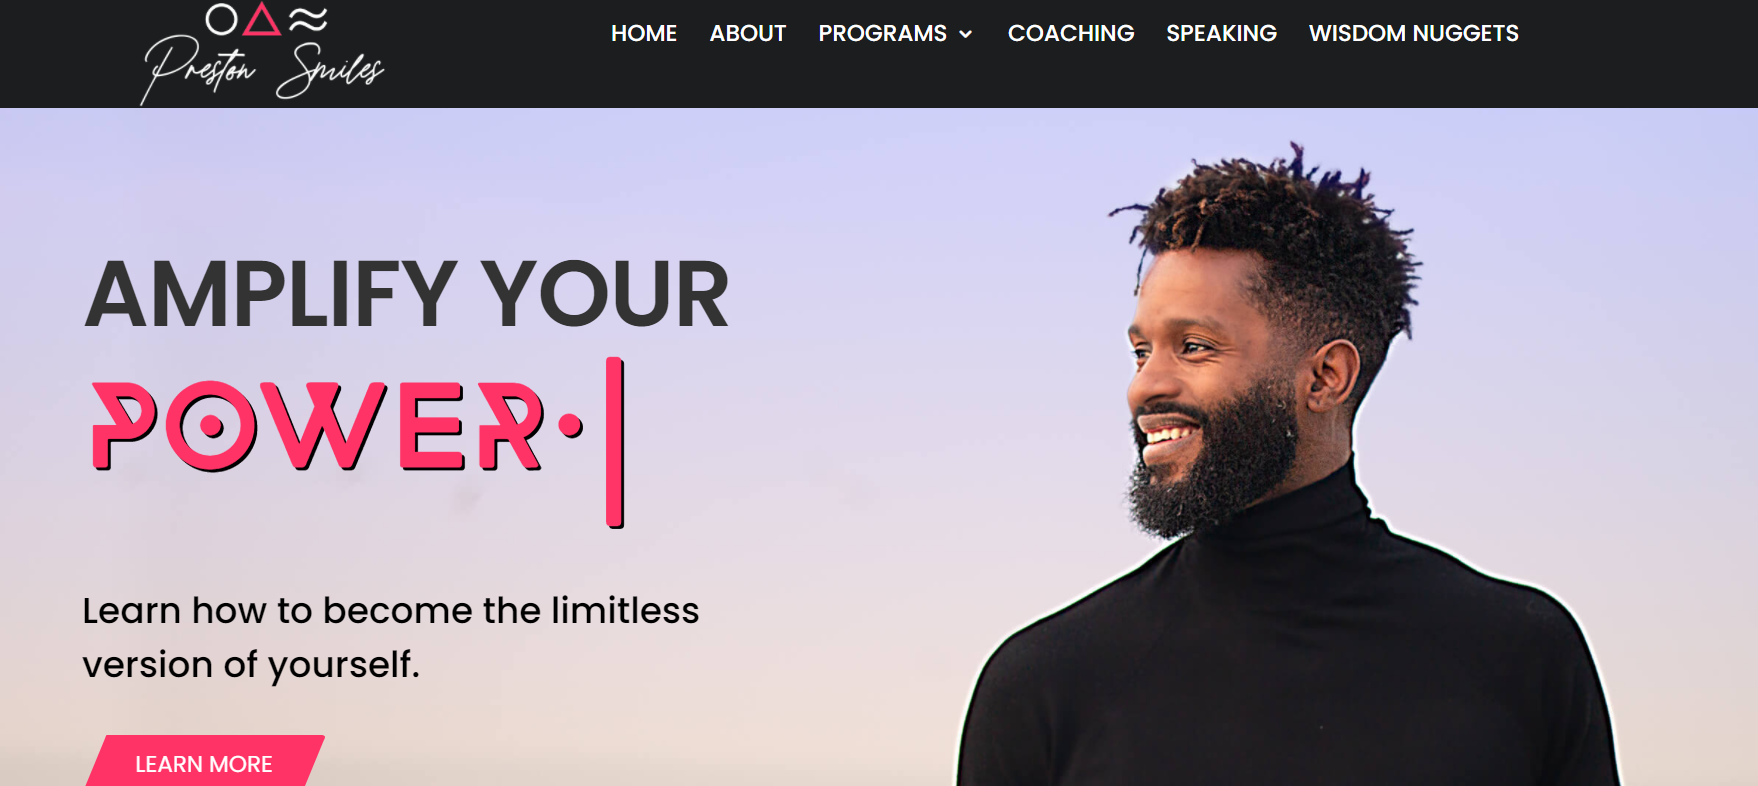
Same as A, client is facing camera, but their head is turned in profile, looking to the left (see below). WHY, you might ask? When we have a human looking towards the text, it emphasizes it’s importance. There have been countless website UX and UI studies proving this as a method to increase conversions. That’s geek talk for: it works, please give me this option!
3. Lifestyle and Story Shots
In these photos, the coach is working or doing something natural (talking on the phone, walking the dog, interacting with a client). Most importantly, these photos tell a story, and draw the viewer in to connect with the coach. Please provide me lots of options, in various sizes here, both landscape and portrait. A wide aspect ratio is always preferred, I can generally crop a shot, but I can’t back the camera up!
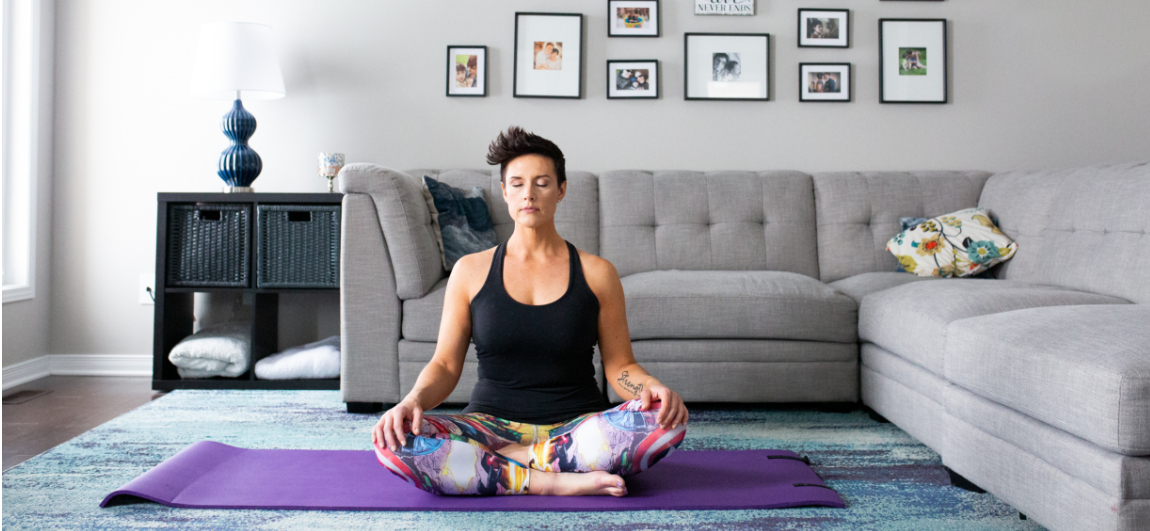
Photo Credit: Ashley St. Germain
4. Wardrobe and Location
Preferrably 3 different locations for the shoot (locations can be different rooms in a house, or different places within one location). 3 changes of wardrobe as well, if possible! Changing hairstyles (for example putting hair up in a ponytail) or adding a hat can be a quick wardrobe change.

4. Quirky, Fun Shots
If it works, it can be very useful to have photos of the coach pointing at something (up, down, or sideways), and / or doing something quirky or fun. While this may not be ‘on brand’, it can provide personality and may work for social media as well.
Step 4 – Get On It!!!
Having your photography at the beginning of a project is key. It will help inform our colour selection, our brand look and feel, and the wireframing and architecture of the website (that’s a fancy way of saying…where we’re going to put stuff). So even if you HATE getting pictures done, get on it! It will speed up your website process, and that can only be a good thing.
_____________
I hope this round up of tips and information on getting amazing photography for your coaching website has inspired you! Let’s get going on creating connection with your clients through your website images.
What was your favourite part? Let me know in the comments!
Frequently Asked Questions About Coaching Website Brand Photography
Still have a few questions about photography for your coaching website? Let’s break down the most common ones I hear from coaches and consultants:
1. Do I really need professional photos for my coaching website?
Absolutely! Strong, story-driven images help your future clients trust you before they even read a word.
2. Why are brand photos better than corporate headshots?
Brand photos capture your personality, style, and energy, plus they help authentically connect with your clients through storytelling. Corporate headshots don’t show the real you!
3. How do I choose a personal brand photographer?
Look for a photographer who knows brand photography, shares your style, and helps you feel at ease.
4. What should I wear for my brand photoshoot?
Stick with your brand colours, bring a few outfits and props for variety, and make sure you feel confident (because that will show up in every frame)!
5. What instructions should I give my photographer?
Be super clear: you’ll need header images, lifestyle shots, a few quirky or fun poses, and consistency with your brand colours.
6. How do colours play a role in brand photography?
Your brand palette should shine through in clothes, props, and even backgrounds — so everything feels cohesive, everywhere you show up.
7. What brand photography trends should coaches know for 2026?
Lifestyle images that are “in the moment”, genuine, relatable, and have minimalist backdrops are in. Overly polished and perfect? Out. Clients want to see the human side of you!





0 Comments